Zphisher is a popular phishing tool for Termux that helps create fake login pages to test security vulnerabilities. It is widely used for ethical hacking and cybersecurity research. In this article, we will explain how to install and use Zphisher in Termux step by step in 2025.
 This guide is for educational purposes only. Unauthorized phishing is illegal and punishable by law. Use this tool responsibly for ethical hacking and cybersecurity research.
Requirements
Before installing zphisher make sure you have:
- An android device.
- Stable internet connection.
- Termux latest version.
- Basic knowledge of Termux commands.
If you have these requirements then you are good to go for the next step.
how install zphisher in termux
Here are commands to install Zphisher in Termux. You can copy and paste these commands one by one in your Termux.
1. Update and Upgrade Termux
Before installing any tool, updating Termux is essential to avoid errors. Open Termux and type the following command:
apt update && apt upgrade -yThis command updates and upgrades all the installed packages.
2. Install required packages
To run zphisher, Install required packages like git, php by using this command:
pkg install git php curl openssh -yThese packages help Zphisher work properly.
3. Clone Zphisher from GitHub
Now, download Zphisher from its official GitHub repository by running:
git clone https://github.com/htr-tech/zphisher.gitThis will create a new folder named zphisher in Termux.
4. Navigate to the Zphisher Directory
Once the zphisher is downloaded, move into its directory using:
cd zphisherNow, you are inside the Zphisher folder.
5. Give Execute Permission
Before running Zphisher, you need to give it permission to execute. Use the following command:
chmod +x zphisher.shThis makes the script executable.
6. Run Zphisher
Now, you can start Zphisher by using this command:
bash zphisher.shYou have successfully installed zphisher in Termux. Now let’s how you can use zphisher.
how to use zphisher in termux
Since you have installed Zphisher in Termux, let’s go through the steps to use it properly.
1. Open zphisher folder
First, open Termux and enter this command:
cd zphisherThis will take you to the Zphisher folder.
2. Start Zphisher
Now, start Zphisher by typing:
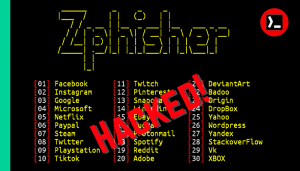
bash zphisher.shIt will show a menu with different websites like Facebook, Instagram, Google, and more.
3. Choose a Website
You will see numbers next to different websites. Here you can see the screenshot:

Type the number of the website you want to use and press Enter.
4. Select Link Type
After selecting a website, Zphisher will ask how you want to create the phishing link. You will see options like:

Type 2 for Cloudflare (this works best) and press Enter.
If you choose cloudflare then turn on your mobile hotspot.
5. Get Your Phishing Link
After a few seconds, Zphisher will create a fake login page and show a link like:

Copy this link and share this link with the victim to test security vulnerabilities (for learning purposes only).
6. See Login Details
When someone enters their username and password on the fake login page, Zphisher will show the details in Termux.
Common Errors and Fixes
1. No Phishing Link Appears
- Turn on your mobile hotspot.
- Restart Termux and run the script again.
- Try this command before running Zphisher again:
termux-reload-settings2. Cloudflare Not Working
Use localxpose instead of cloudflare, if cloudflare doesn’t generating link.
3. Both cloudflare and localxpose not working
If both cloudflare and localxpose not generating link then you can use localhost option.
Conclusion
Zphisher is a powerful phishing tool for Termux that can create almost all social media website phishing pages. In this article we have provided the latest commands to install and use Zphisher in Termux.